
This Zip scarf pattern was taken from

Gauge: Not important. Judge by your yarn weight. I used an H for my medium worsted yarn. I recommend an I or J for chunky yarns.
**Remember The chunkier your yarn, the thicker and wider your scarf will be
Stitches Used:
ch – Chain Stitch
dc – Double Crochet
slst – Slip Stitch
fpdc – Front Post Double Crochet
bpdc – Back Post Double Crochet
Shell - Shell Stitch (2 dc, 1 ch, 2 dc in same stitch)
If you are unsure how to make a fpdc or bpdc I recommend looking up the stitches on youtube.
*This scarf takes roughly 2 skeins of yarn. I use about 340 yards. *If you use specialty yarn that is less around 100 yards a skein, I recommend getting 4 skeins.
*Note. After finishing with your first skein of yarn, I recommend cutting your fringe. It will lay nicer if the yarn is cut from the top of the skein. Towards the end the yarn gets curly. I cut 4-5 strands for each set of fringe, depending on yarn weight. You will need 12 sets of fringe.
*We will first be creating loops. These are important because they are used to attach the fringe to the scarf. The double crochet is also important, it acts as a filler stitch so there will be no gaps.
Pattern:
1. Ch 19. (Leave a long tail, it will be tucked and blended into the fringe later)
2. Ch 3, dc in your original 19th stitch. (4th chain from hook) Skip 2 ch, slst in 3rd ch. *Ch 3, dc in same stitch, skip 2 ch, slst in 3rd ch. Continue from * to end. (you should have 6 loops total)
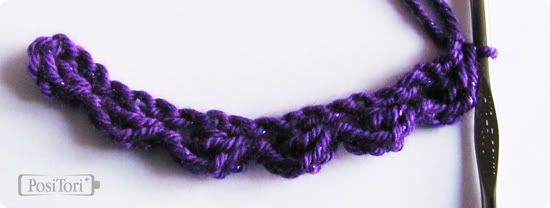
*Do not turn, instead continue on the top stitches of your original 19 chains.
3. Ch 3, Shell Stitch into first chain (ch will be connected to your slst knot), *skip 2 ch, dc, skip 2 ch, shell, Continue from *. (Last stitch should be a shell), Turn.
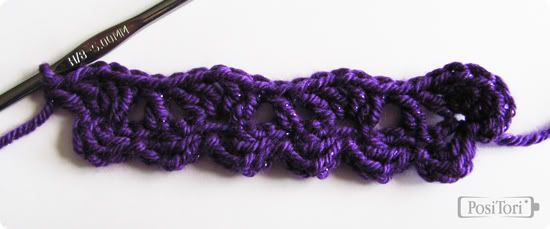
4. Ch 3, shell in first shell stitch gap. (the chain between your dcs), *bpdc around next dc, shell in next shell stitch gap. Repeat from *. Turn.
5. Ch 3, shell in first shell stitch gap, *fpdc around previous stitch's bpdc, shell in next shell stitch gap. Repeat from *. Turn.
6. Continue alternating bpdc and fpdc pattern until desired length.
F.O.
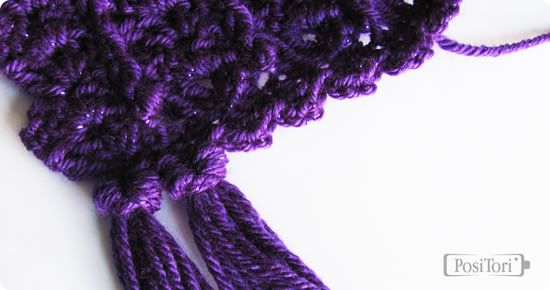
7. Ch 3, *dc in same stitch, skip 3 stitches. Slst in next stitch. Ch 3 repeat from * to end. (last stitch will fall on outside chain stitch)
8. Attach Fringe through the chain loops only, don't pull fringe through the dc's.
This scarf makes a great gift for family and friends! Or just make one for yourself! It's really easy and relaxing once you get the hang of it. I love this pattern and I hope you will too :) I also put this pattern up on Ravelry. If you make one I'd love to see it!
No comments:
Post a Comment