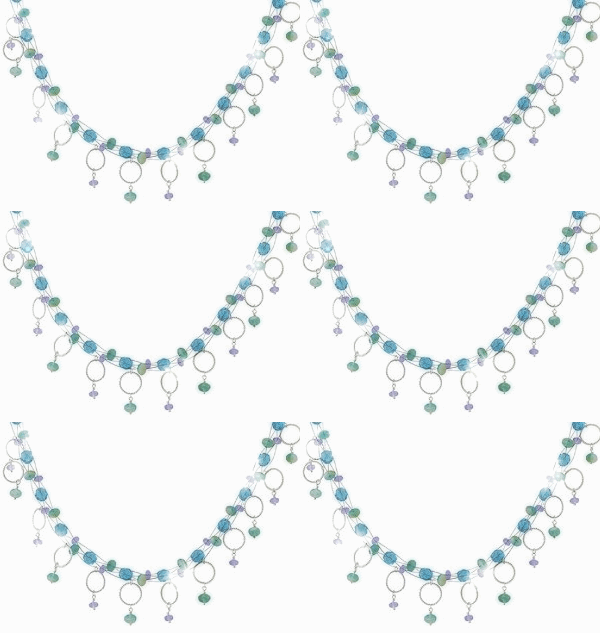
Taken from
Bead Type: Glass, Miscellaneous
Time to complete: In an evening
Bead Technique Used: Strung
Bead Project Type: Necklace
Difficulty Level: Intermediate
Materials:
(12) 10mm blue topaz faceted Czech glass rounds
(16) 6x9mm blue, white, green swirled Czech rondelles
(17) 4x7mm lavender Czech glass rondelles
(12) textured silver plated closed rings (314B-144)
one silver-plated 2-strand clasp (355B-010)
four size 3 silver-plated crimp tubes (JFCT3S)
two 20-inch segments .018 19 strand purple Beadalon Clear Colors wire (JW15PU)
two 20-inch segments .018 19 strand green Beadalon Clear Colors wire (JW15GR)
(24) 3x4mm oval silver-plated jump rings (314B-109)
Designer Ergo Round Nose Pliers (201E-030)
Two pairs Designer Ergo Chain Nose Pliers (201E-020)
Designer Ergo Cutter (218H-030)
Bead mat (202E-002)
Instructions:
Remove two 20-inch sections of each color wire.
Create six lavender rondelle coiled dangles.
Create six swirled rondelle coiled dangles.
Attach wires to one end of clasp, one of each color on each loop of clasp with purple to the outside, using two crimp tubes. Use chain nose pliers to pull the two wires though crimp, leaving room for play between crimp tube and clasp.
Uncross wires inside of tubes and crimp. Clip off excess wire tails flush to bottom of crimp tube, leaving longer strands for making necklace.
Slide 10mm round on two center green wires.
Slide inner and outer wire on one side through a lavender rondelle.
Slide inner and outer wire on opposite side through a swirled rondelle.
Place inner wires (should be green) through another blue round.
Continue weaving wires in and out of beads, alternating placement of lavender and swirled rondelles each time.
The key to these designs is tension--not too taut but not too loose. As you work, continue to slide the beads down the wire and create tension.
When you reach the final blue round, work your way back through the wires to adjust the tension. The choker should be fairly flexible but also have a definitive form. The spaces between the beads should be equal to support this form.
Attach wires to opposite end of clasp as before. Keep the design rounded to maintain form as you crimp. Make sure wires are crimped evenly.
Attach textured circles to bottom of choker using two pairs of chain nose pliers to open jump rings. Place the circles after the first large bead in the pattern and after each large bead as you continue along the choker.
Attach the pre-made coiled dangles, starting with lavender and alternating between lavender and swirled rondelles hanging from bottom of textured circles using jump rings.
Check back through design to ensure all jump rings are properly closed.


No comments:
Post a Comment